Showing posts with label DIY. Show all posts

Tuesday, January 27, 2015

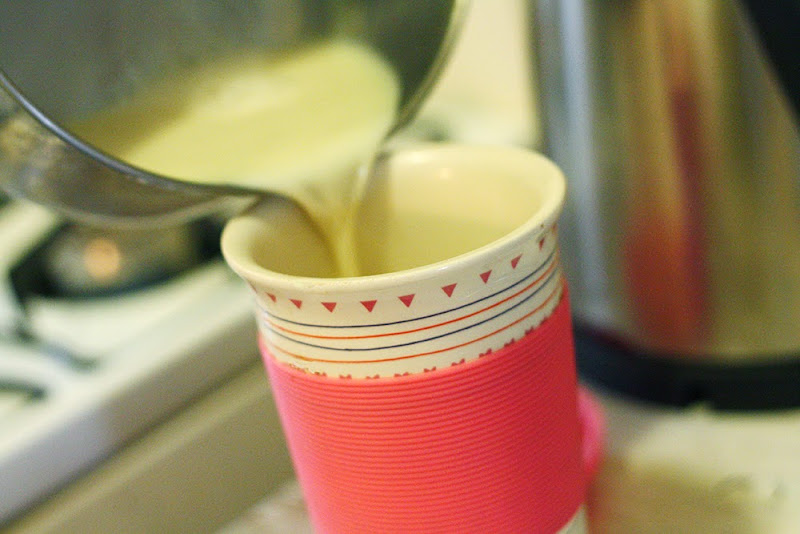
Stove Top Vanilla Soy Latte

I've always been a coffee lover. 
Ever since I was little I loved the smell of it.
Now it's part of my daily routine.

It tastes amazing and it wakes me up when I need it!
My favorite kind of coffee to drink is a latte.

I used to go buy expensive lattes, in fact that was the only way I would drink a latte. The coffee I made at home just couldn't compare to the artisan lattes at coffee shops. But lattes are expensive, like really expensive! When I read that Starbucks lattes are $38.00 a gallon, I was done. And I like to use soy milk.. which usually tacks on another .60.. which adds up.

Plus, store bought lattes make a lot of waste! Unless you bring your own cup, you get a disposable cup which isn't good for the Earth at all! So, as part of my plastic free year, I also decided to make it a paper free year. I'm no longer buying anything "disposable".


Which incidentally means no more store bought lattes.

I decided I would learn how to make my own.
After quite a bit of trial and error, I've discovered how to make really good lattes at home.

I do not have a milk steamer, I don't have an espresso machine. I do it all by hand on the stove. It takes me about 6 minutes to make my espresso and it's totally worth it.


Vanilla Soy Latte.


Tools:
Medium Sauce Pan
Espresso maker (stove top, coffee maker, french press) 
Whisk 

Ingredients:
Espresso or strongly brewed coffee
Milk (I use soy or coconut)
Sugar (to taste)
1/2 teaspoon vanilla
dash cinnamon
dash nutmeg

A latte is usually 1/3 espresso, 2/3 steamed milk.
You can make it as strong as you'd like.

Brew your espresso with a sprinkle of nutmeg and cinnamon.
This really enhances the flavor of the coffee, and it gives it a very cozy taste.

While your coffee is brewing, warm your milk in a medium sauce pan on low-medium. Don't cook it too quickly too hot because you don't want to scald the milk. I've found that almond milk always gets a burned taste when it's heated up, so I usually choose soy milk. As the milk warms, add sugar to taste, and about 1/2 teaspoon of vanilla.
Continually whisk your milk while the coffee is cooking.

Once they are done, combine in the 1/3 espresso, 2/3 milk ratio.

I always like to whisk and froth up the last bit of milk to pour over top.

Stir together, and enjoy.
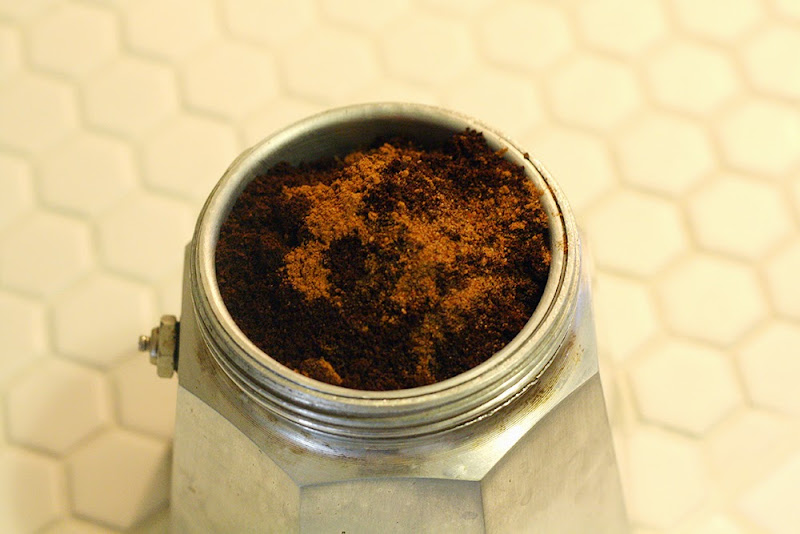

Cinnamon enhances the flavor of the coffee, nutmeg gives it a very cozy feel.
This makes about 2 espresso shots in 5 minutes.
Don't let the milk get too hot too fast, it can burn the edges of your pan. (Like mine)


It's delicious...
and so much cheaper and better for you. 

Monday, August 25, 2014

Make Your Own Dress Form with Duct Tape.

My heart is heavy today. Heavy. Like really real stuff. I'm attributing some of these raw feelings to the New Moon today. I actually did a post on the New Moon today over at Lotus Tarot. I don't want to give into these raw feelings too much.. other than take the path of healing that this Virgo Moon is urging. Self love, self healing, forgiveness, and acceptance..

Anyways, this post is not on the New Moon. I posted this picture yesterday with the promise of finally posting that body form tutorial! (Also, cute kitten alert!)

So, here is a little bit about the dress form...  I woke up one day, and told Sterling I had an idea. I set a budget for $35.00 and we ended up going over a bit. I thought I'd only need 3 rolls of duct tape. Boy was I wrong. It was still under the price of a regular body form, and this one has my exact measurements.

Sorry for the rough photos.. My house was a giant mess the day I decided to do this!

What you will need:
Lamp post, coat rack, basically anything with legs for you to put the body form on.
Topper (Optional) This is for the "head" I ended up using a decorative ball and candlestick. I painted them, and glued them together. It's perfect!
Duct tape
Plastic Wrap
Old T-shirt
Stuffing
Fabric
Hot Glue
Ribbon or Trim (Optional)
I found this lamp at the thrift store for $6. It was perfect. 
We trimmed the cord off and I painted it black and silver. 


For the topper, I used a candle stick and decorative ball. I also painted them black and silver. 
To make the paint look like a dark brushed silver, I painted it black then did small spurts of black and silver on the stand and the topper. The end result looks like an antique metal. 


Next is the not so fun part.

You will probably need someone to help tape you. Wear a t-shirt you never plan on seeing again, as it will become part of your dress form. Have someone duct tape you up. To get true measurements, it needs to be pretty tight. It can get a bit hard to breathe, plus you will want to sit... That's probably too bad, cause sitting or doing anything will add lumps and wrinkles. So be prepared to stand still, with shallow breathing and a bit of back pain. Oh yeah, it might be hot. 

Oh, and please have extra tape. We ran out, of tape. Sterling had to run to the store and buy more.
It was rough. 


Put plastic wrap around anywhere the tape will touch your skin. I only used it on my neck because my sleeves were long enough. Please notice the lack of smile on my face. We may have taped me up a bit too tight and at that point it was taking way longer than I thought. It was worth it through. 


Once you look like you are ready for a little space party in your duct tape dress.. it's time to take it off! 
(Wohoo!!) 
Now assuming you trusted the person who taped you up, hand them a pair of scissors and trust them to cut the space party dress off of you. "Cut the t-shirt and plastic wrap, but NOT my bra! Or my skin. Please." 
A success. 

Now it's time to tape the back up of your empty body form. 
I put some cardboard over the neck and arm holes and taped over them.

The next part is kind of tricky, as you are attaching a body form to a stick. 
And I'm going to kind of step out of this "how to" for a moment and tell you you may be on your own for this part. Each stick or stand is going to be different. We used a lamp post for crying out loud. I kind of let Sterling figure it out. I was taking advantage of taking deep breaths and sitting again.  

What I think we ended up doing was sticking the pole through the body and screwing it through the neck. We used glue, screws, and more glue until it finally stood. 

The next part is stuffing it. You want to stuff it so it's pretty full, but not too full, because then you can end up with a hunch back, or lopsided butt. So, fill it up just enough.. not too full. Mine ended up having a bit of lumpy hips, which I was able to fix just a bit. (Also I do have bony hips) 
It turns out when I stand I tend to pop a hip out and keep my weight on one leg more than the other, so my dress form looks like she is full of sass. I love it. 

Then cover your body form with fabric. I chose to use the red velvet I used in my dining room makeover. I've seen some mod podge newspaper or vintage paper over the tape. Either way, you probably want to cover the tape up. 
(Notice how messy my house is getting?!) 
I covered it with velvet using hot glue and fitted strips of fabric. I tried to keep the strips uniform and fitted, but this time the project had taken about 4 hours more than I thought it was and I was just wanting to be done. 
I hid the seams with white trim and ribbon. This gave it a finished vintage look. 
I think over all the dress form durned out great. There are some minor flaws in it, but it is a copy of me after all.. and aren't we all full of flaws? 
Good luck. If you make one, I'd love to see pictures and help answer questions! 


View More:
 

Monday, July 21, 2014

Apricot Fruit Leather from My Tree

Yesterday I posted a photo on Instagram  of me up a tree picking apricots! I went over to my family's house to celebrate my dad's birthday and I went out back to my favorite tree to pick my favorite fruit!
I've shared my tree with you before..  I even have a little tree that grew from one of the seeds on my front porch! This is the tree I talked to while growing up... which is where Talk2thetrees comes from. 
So yesterday it was a lot of fun to pick as many apricots as I could. Sterling was at the bottom of the tree holding a bag for me while I climbed up and stuffed my pockets as full as I could until I climbed back to the bottom to empty my pockets. 
I know this tree like the back of my hand, so climbing it isn't a a problem for me... It was something I did every day while growing up, so it's always fun to climb it again and again. 
I collected almost a full bag of apricots and have decided to make fruit leather with my oven. 

I'm going to do my best to not eat it all in one sitting... especially because it takes so long to make! 

Here is my recipe for Apricot Fruit Leather

2 cups Apricots (about 13 small ones)
1/2 cup of sugar 
1 tsp lemon juice


Remove the pits, and mash up the apricots and put in a sauce pan. Add the lemon juice and the sugar and cook on low until the sugar dissolves. The lemon juice keeps the fruit from turning brown. You can add more or less sugar depending on your taste. Once the sugar dissolves put your mixture in a blender and purify it until it's liquid.
Line a baking sheet in plastic wrap, and pour your apricot mixture onto the saran wrapped baking sheet, leaving about an inch from the ends of the saran wrap. 
Bake your fruit leather at your lowest oven setting for about 4-6 hours, or until it's no longer tacky. 
It's good to prop your oven open slightly with a spoon or some tongs. 

In the summer heat it seems impractical to keep your oven on during the day... but so far it hasn't heated up my house! 

Enjoy some delicious fruit leather. I know I will! 


View More:
 

Monday, April 28, 2014

Powering Through...

I haven't blogged much lately.. and I'm pretty okay with that. I've been busy, very busy. This weekend was the weekend I decided to redo my bedroom, and I think my house makeover is mostly complete. Minus the slight cleaning and organizing that is needed now.

This weekend was especially nuts because I decided I wanted to repaint all my bedroom furniture, and it rained. If you know me, you know that that isn't going to stop me. So, I put down a giant tarp and I moved everything into my kitchen. This was a long process that left my entire house a huge disaster.
You could barely walk to the bathroom without tripping.. Both dogs were pretty stressed out from it. Wicket especially... he gets stressed out so easily. I wanted to finish the furniture by that night so I could put things back into them, the house was a giant mess, all things in the dressers and on top were out all over the floors, and the dining room furniture was in the living room making it very hard to get around. That's when the power went out.
We powered through it by candle light. It was the most stressful and hilarious weekend ever. Luckily the power came back on after about an hour.
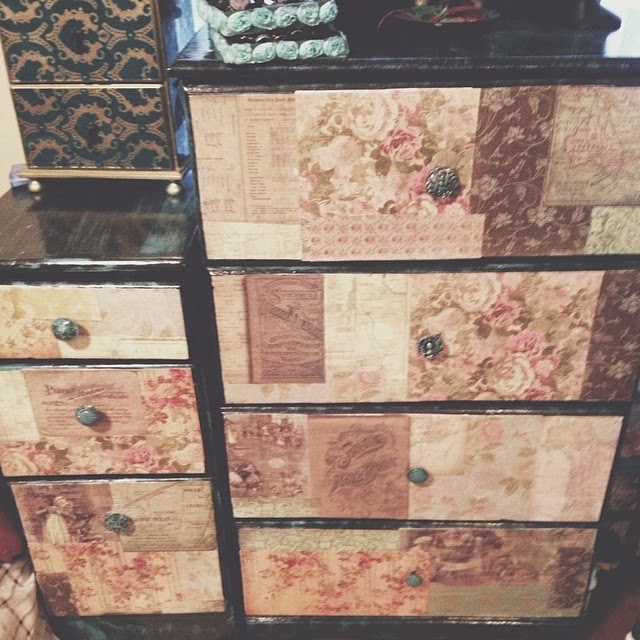
But, the furniture turned out fantastic. I repainted them dark brown with teal details and vintage inspired papers over the drawers. Even the knobs got a new paint job.

We got us some pallets for the bed frame, but only ended up using 2.25 of them. My bedroom is way too small for the full sized pallets, so Sterling cut them down and sanded them for me. We were very careful to select the cleanest ones, clean them better, paint and varnish them. They only raised the bed by a little bit which is perfect for my small pups.


And now I have plenty of extra pallets for other projects! Sterling wants to build a bench and a hanging garden for me... but that's a project for a different weekend.

We also took down everything on the walls. I was going for a more simple look in the bedroom. We hung up a few pieces of work, and added a few plants. I'm working on some paintings for the room too, but I am planning on keeping it simple.. Well the walls and decor simple. Mostly because everything else is very extreme. I chose very deep rich colors, and a mixture of textures.


Sterling helped me hang up a canopy above the bed and some paper lanterns we found at the antique store. And now there are just the small details of finishing the paintings, and organizing the tops of the dressers... But we finished... just in time for Monday.

I will take better photos when it is all finished... but I'm very happy about the transformation. It was more expensive than I planned, and so much more stressful. But, I'm happy with the results.


View More: